

Atom 3.5
HOME> Support Services> Atom 3.5> Auto-Leveling
Auto-Leveling Setting Tutorial
Before your first print, and anytime you remove the build plate, you’ll want to run an auto-level to ensure that your parts adhere well to the glass. Follow the procedure below to run an auto- level
1. Make sure the nozzle temperature is in room temperature
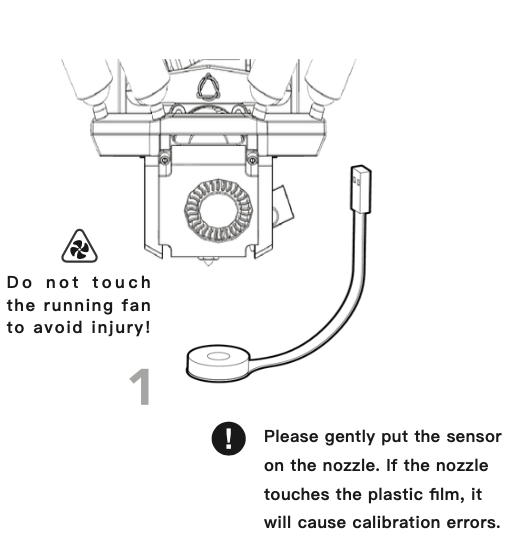
2. After connecting the automatic calibration sensor to the green line of the mobile platform cable set, properly cover the nozzle with the white sponge ring.
Note: Please gently put the sensor on the nozzle. If the nozzle touches the plastic film, it will cause calibration errors.
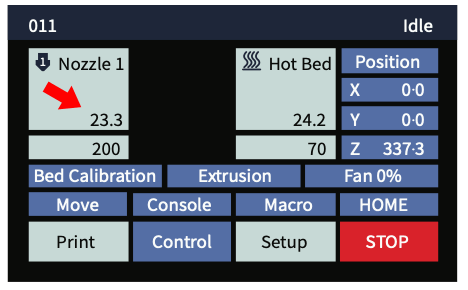
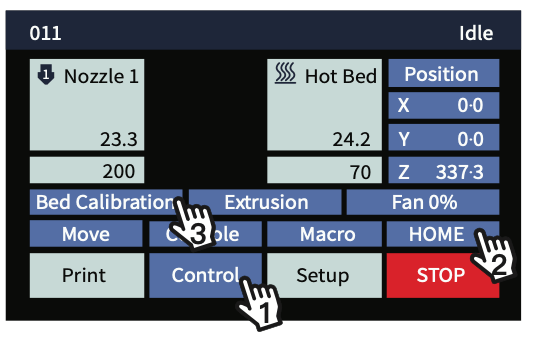
3. Click [ Control ] > [ HOME ] > [ Bed Calibration ] on the LCD screen to auto-leveling.
4. After the automatic calibration is completed, the automatic calibration sensor will be removed
Clean the Build Plate
To prepare the build plate for printing, use rubbing alcohol and
a soft, lint-free cloth or white paper towel to remove any dust and oil from the surface of the glass. DO NOT use colored paper towels or white board cleaners.