

Common Problem
HOME> Support Service> Technical Support> FAQ
Print the appropriate height
After performing automatic calibration, you can start to verify the set results. The first layer at the beginning is the most critical element; the correct arrangement should be as shown in "Figure 1". Each path has a clear texture, a stable output, and there is no gap between the outer and inner fillings. If it is printed with " In the case of "Figure 2" or "Figure 3", you can fine-tune the height of the nozzle.
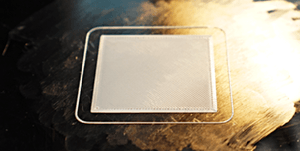
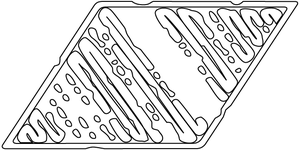
Figure 1: Moderate height
The care path is neatly arranged on the bottom plate, and there is no gap between the inside and the outside.
If there is a gap between the outside and the inside, it means that the nozzle is not locked, please click here to check the nozzle mechanism and recheck. To
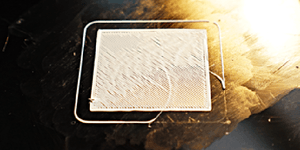
Figure 2: The nozzle is too high
The material cannot be smoothly adhered to the bottom plate, causing wrinkles and curling deformation. You can slightly tighten the screws in front of the print head and do an automatic calibration to reduce the print height.

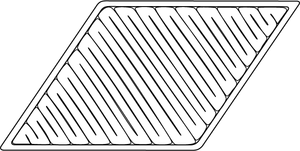
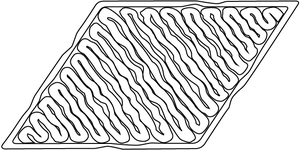
Figure 3: The nozzle is too low
If there is no space for discharging, the print head will scrape directly to the bottom plate, and finally there will be lines in some places and no lines in some places. You can slightly loosen the screws in front of the print head and do an automatic calibration to increase the print height. To
Can't solve the problem?