

Slicing technical support
HOME> Support Service> Technical Support> Slicing Software
Cura 15 version double feed teaching
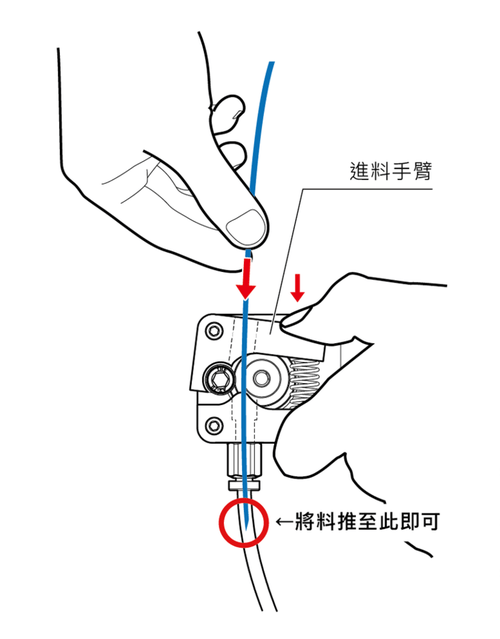
Please manually feed the wire into the extruder (E0, E1) on both sides and push it to the red circle position in the figure below.
Let’s proceed to the next step. There are two methods. Choose one to proceed:
● Manual mode
Through the LCD operation, the steps are as follows:
「Filament→Load E0→E0 Back to JCT→Load E1→E1 Back to JCT→Start Printing」
This function needs to update the firmware version to 180529 ver.
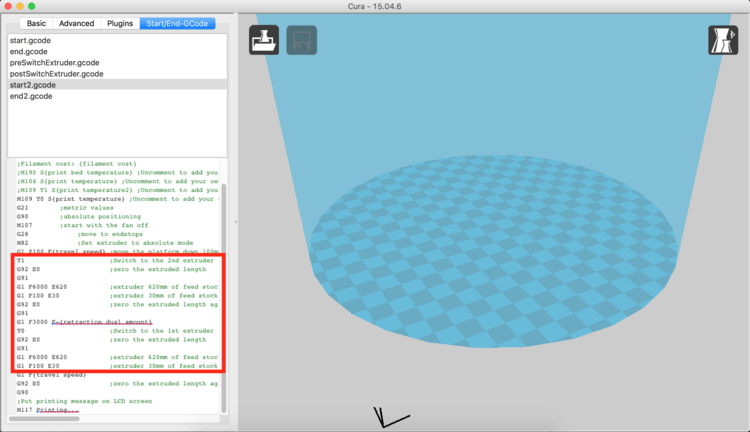
● Gcode method
Please go to the official download area and download the Cura 15.04.6 dual-material printing configuration file.
Double extrusion actual printing test
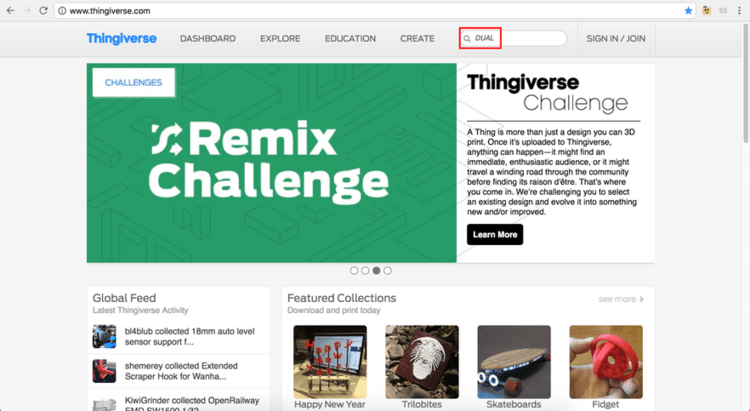
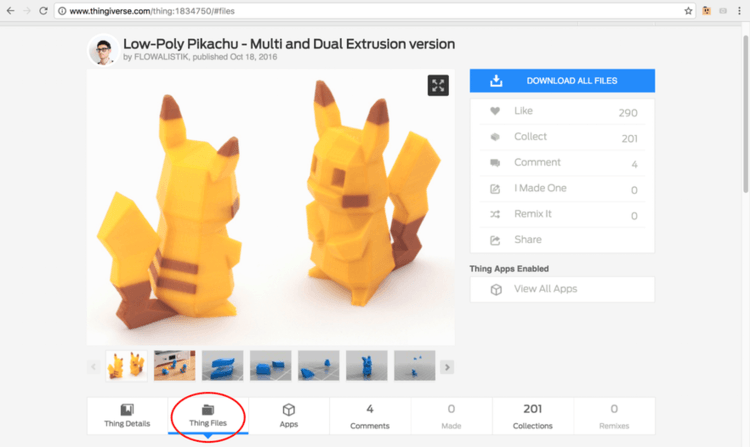
1. You can first go to "www.thingiverse.com" and enter "DUAL" in the upper right corner to find the dual-jet file and download it.
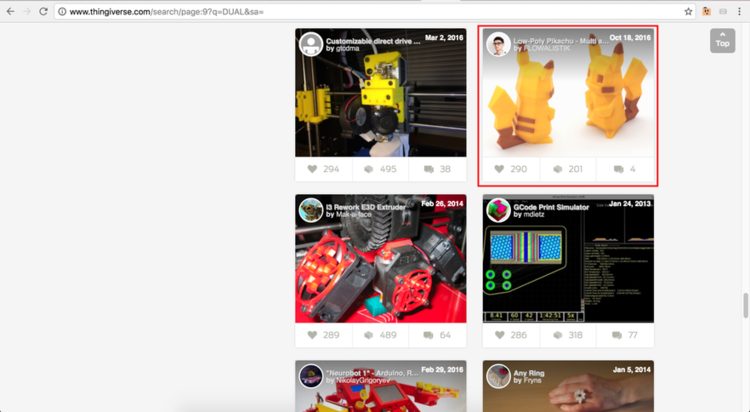
2. Take the Pikachu file as an example, click on the left to enter the link.
3. After entering, please select "Thing Files".
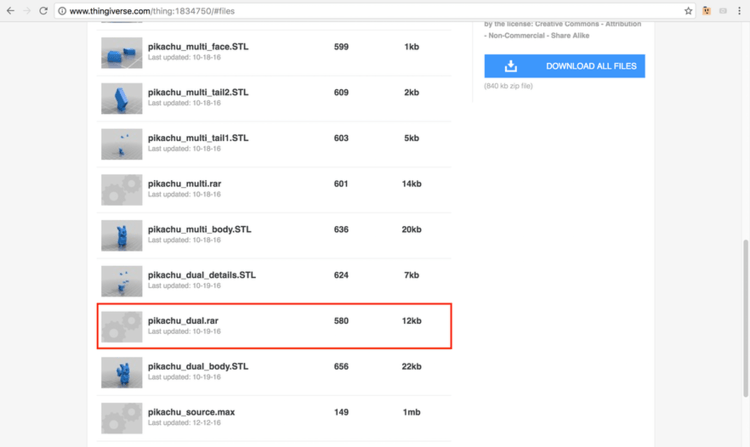
4. Next select "pikachu_dual.rar" to download, there will be two files after downloading and decompressing.
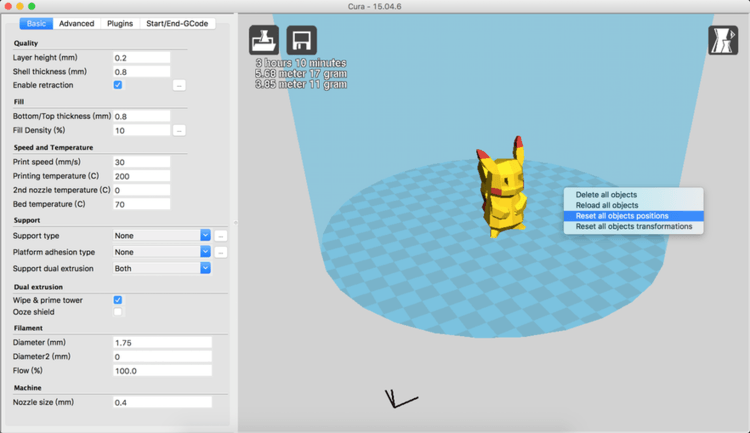
5. Drop them into CURA in order, right-click and select "Dual extrusion merge" to merge.

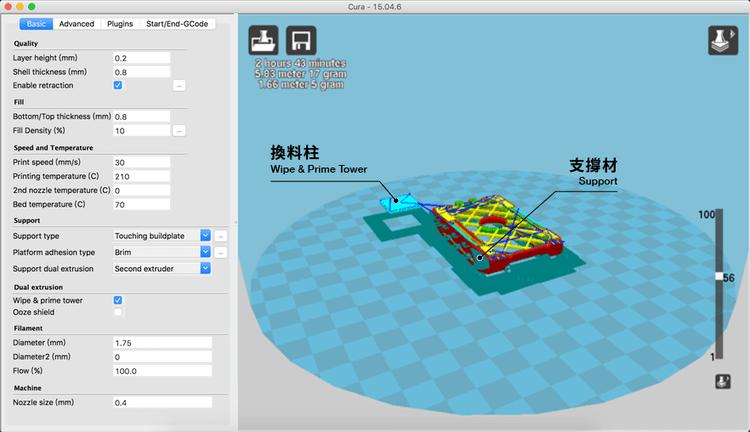
6. E0 (yellow) will be lost first, E1 (red) will be lost later, and then click "Reset all objects positions" to center the model.
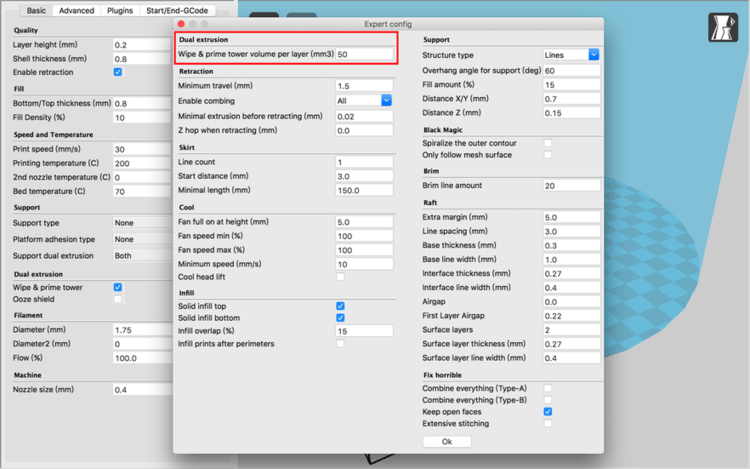
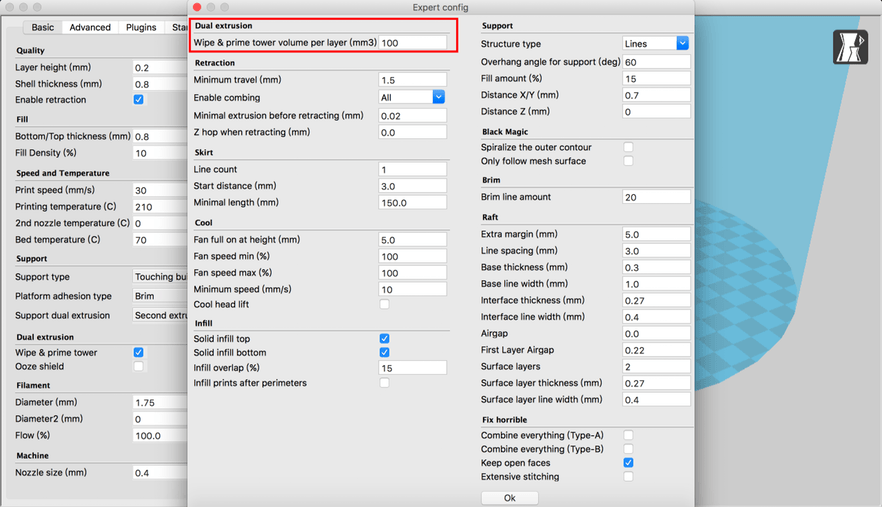
7. Please note that if the model has serious color mixing, please increase the value of "wipe & prime tower volume per layer (mm3)";
If the colors of the two materials are similar, it can be reduced.
(Supplement: In the color selection of double materials, please choose similar colors to avoid serious color mixing and save the amount of PLA)
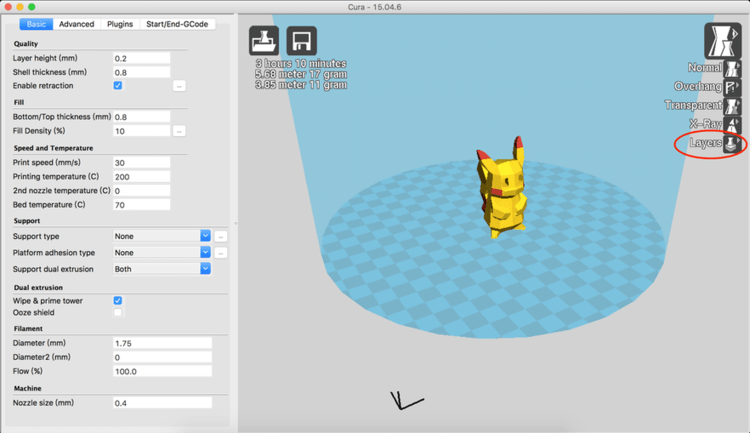
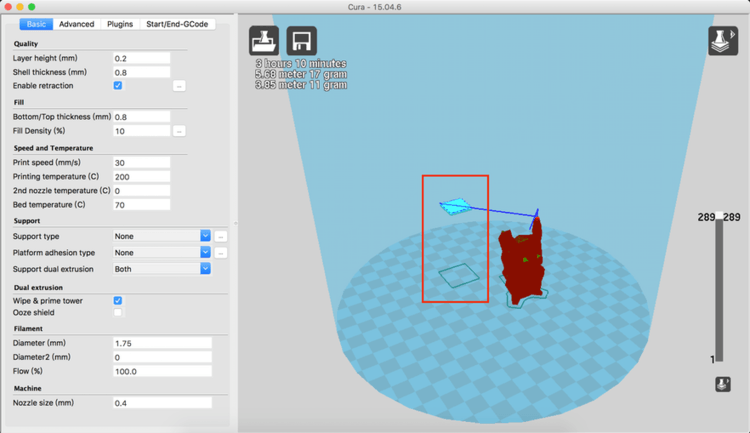
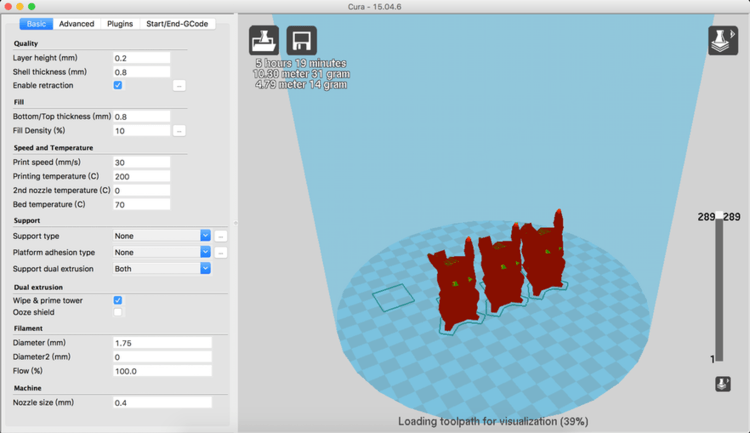
8. Select "Layers" in the upper right corner.
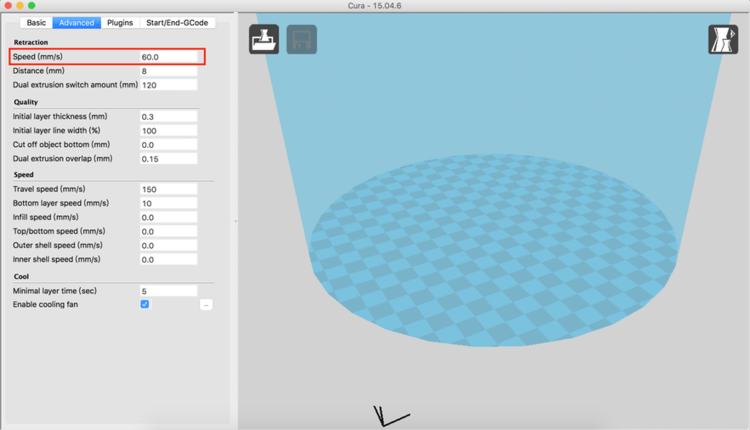
9. Observe whether the refueling column exceeds the printing range (the red box is the refueling column). If it exceeds the printing range, please try to move or reduce the model.
(Please note that if the refueling column is too small, it may collapse. It is recommended to increase the "Z-hop when retracting (mm)" or increase the bottom area to enable the "Brim" function). To
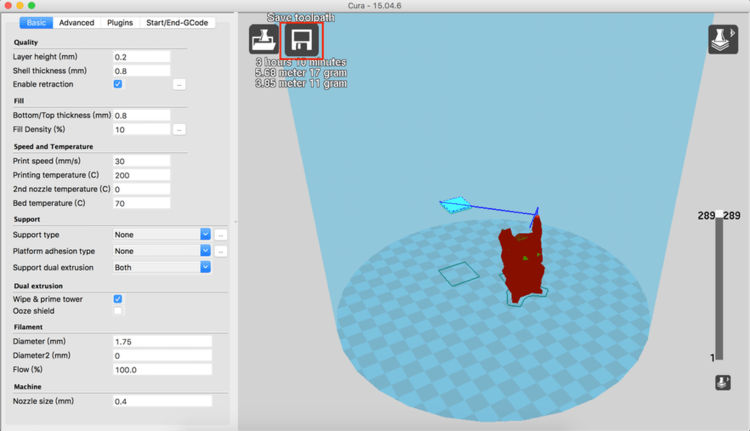
10. After confirming that other parameters are correct, you can save the file. A "XXX.gcode" file will be generated, and then thrown into the SD card for printing.
Double extrusion advanced application: copy model
1. Right-click on the merged model and select "Multiply object".
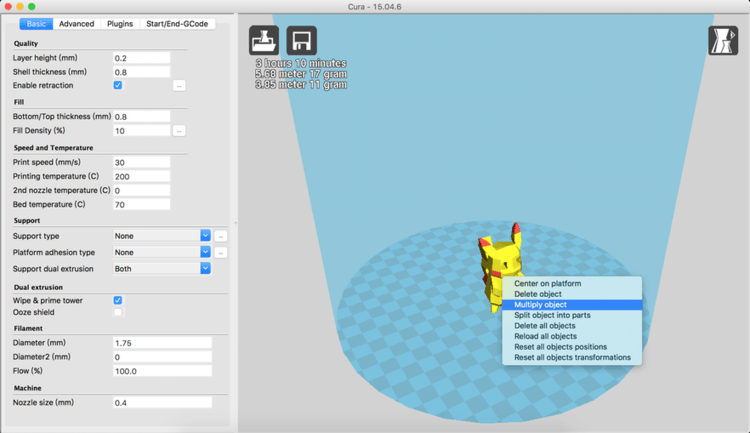
2. Enter the quantity you need (the input value does not include the body).
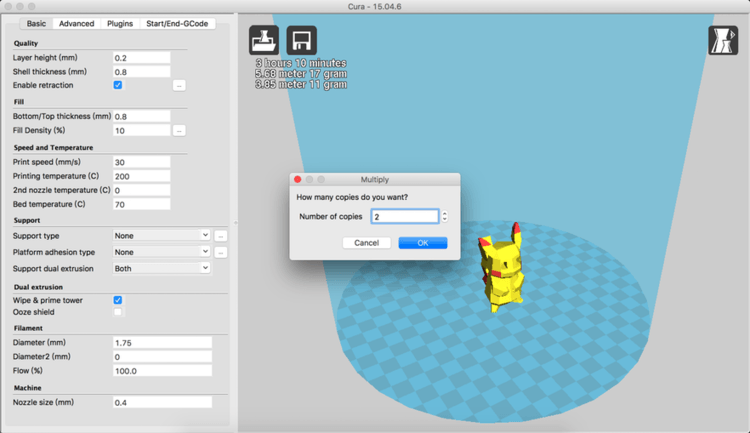
3. As shown in the figure above, enter the quantity 2 and add the main body to make a total of three.
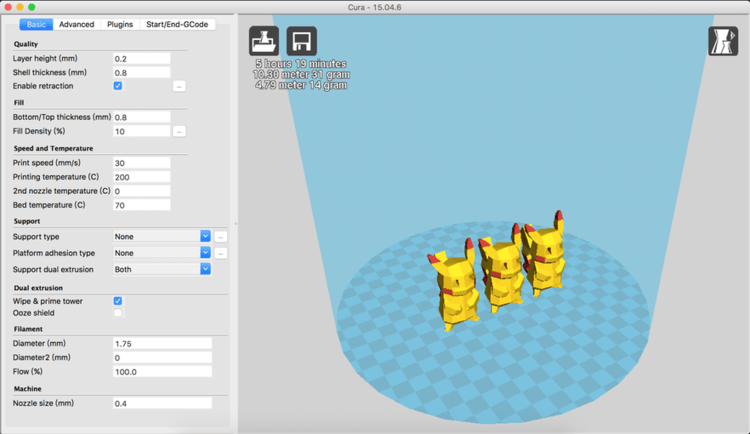
4. Select "Layers" again to check whether the refueling column exceeds the printing range. After confirming that other parameters are correct, you can save the file, and a XXX.gcode file will be generated, and then throw it into the SD card for printing.
Double extrusion advanced application: copy model
1. If you want to start using the support material, please turn on the support option first.
1-1. "Support type" is to select the type of support, "Everywhere" is the support that will grow on the model, and "Touching buildplate" is that the support material can only grow from the bottom of the glass, and will not grow on the model, so it is relatively easy to disassemble .
1-2. "Support dual extrusion" is to select the extruder where the support material is placed. If the support material is placed E0, select the first extruder, and E1 select the "Second extruder".

Step 2. Take the tank as an example, check the support and refueling column.
Step 3. Please note that it is recommended to increase the area of the refueling column to avoid mixing!
4. The PVA wire is soft, and it is easier to accumulate in the extrusion head and cause empty printing. You can adjust the withdrawal speed to improve this situation.
Can't solve the problem?